Showing posts with label Little Tee Tee - About Me. Show all posts

Monday, 2 January 2012

Happy New Year & New laces released!

With the official 'silly season' behind us I just want to wish everyone a very happy & fulfilled New Year. The New Year is a time to start afresh - leave the mistakes of 2011 behind but build on the lessons learnt. Grab hold of your dreams/aspirations & make them a reality! (Thanks to my friend Janelle for providing me with this challenge)

I have a dream for my little creative outlet (aka Little Tee Tee) & I will be striving to make that a reality this year.  By sharing it, you can hold me accountable & keep me in check.  Feel free to give me advice along the way as it is a little new to me & I appreciate the insight of others.  So ... my goal is to grow the craft supplies side of my business.  Laces & trims (fabric roses etc) will be my speciality to start with but I may add to it as I discover little gems along the way.


I'll still be creating dresses for little girls, selling at markets & taking custom orders for special occasions. I love sewing too much to walk away from that side of Little Tee Tee!

2012 is my year to 'make or break' - to turn a hobby into a business.  Why the deadline, you ask? Well, my youngest is off to school in 2013 so it's now or never!  Here's the beginnings of my little lace empire - Little Tee Tee Laces & Trims. I'll be adding many more throughout the year.


So here's to a succesful year to each & every one of you.  I sincerely hope that you reach whatever goal your heart desires in 2012.


Now, here's where you give me a little nudge in the right direction by leaving a comment below!  Oh, where to start?!?

Wednesday, 7 December 2011

Christmas cooking with kids - Oreo truffle balls


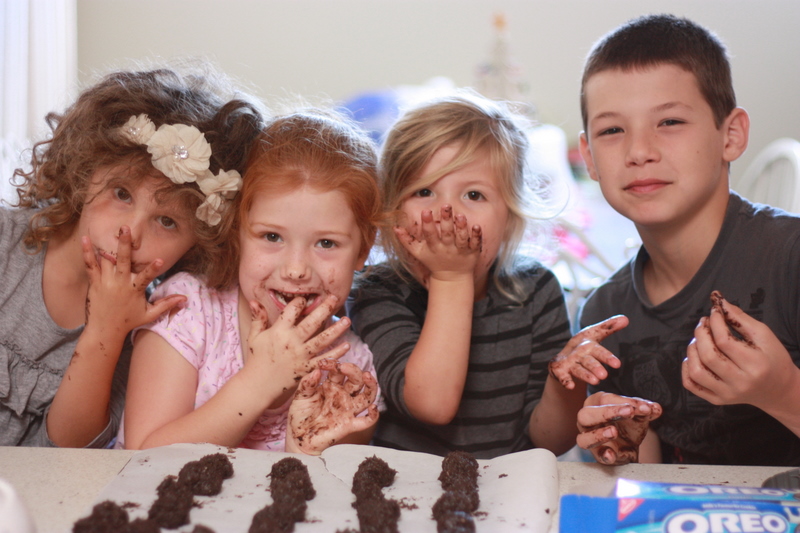
Christmas is not Christmas until the benches have been covered in some variation of sugar, little fingers have been covered in yummy goo, and faces have been smeared with chocolate.  Such is the fun of 'cooking' with kids!

 I say 'cooking' because our first Christmas treat this year was a no-cook Orea truffle ball creation.  Yum, yum, yum!
Ingredients -
1 pkg. (8 oz.) Cream Cheese, softened
2 pkg.  OREO Cookies, finely crushed (not powdered!) 
Enough Semi-Sweet Chocolate, melted, to cover the balls.


MIX cream cheese and cookie crumbs until well blended.
SHAPE into 1-inch balls & refridgerate for an hour.
DIP in melted chocolate; place on waxed paper-covered baking sheet.
For extra effect you could sprinkle with extra cookie crumbs, drizzle another coloured chocolate on top, roll in 100's & 1000's.
Store in tightly covered container in refrigerator.

I took a few tips from the Kraft website.  Perhaps I should have read these before making our own batch! ...

Kraft Kitchens Tips

How to Melt Chocolate
Place unwrapped chocolate squares in microwaveable bowl. Microwave on HIGH 2-1/2 min. or until chocolate is completely melted, stirring every 30 sec.
How to Easily Dip Truffles
To easily coat truffles with the melted chocolate, add truffles, in batches, to bowl of melted chocolate. Use 2 forks to roll truffles in chocolate until evenly coated. Remove truffles with forks, letting excess chocolate drip back into bowl. Place truffles on prepared baking sheet; let stand until firm.


Wednesday, 20 July 2011

DIY fabric bedhead!

I'm a little hooked on this season's 'The Block' (ie Aussie tv reality show with 4 couples renovating homes for a competition).  I was chuffed to see one couple embarking on making their own fabric covered headboard - a little project that I've just recently completed myself.
 

(excuse the skinny shot but the rest of the room was a bit untidy & I was too impatient to tidy it all up!)
 
I've spent years with a very white bed but felt the need for a bit of a change.  I don't like sleeping under patterns but LOVE statement bedrooms.  A fabric covered bedhead means that I can keep my white bed but have a splash of colour behind me!
 
So how do you make your own:
What you'll need:
1. MDF (cut to the size you want your bedhead to be). I actually used 3 boards standing horizontally to give me the height I wanted.
2. Metal brackets & screws
3. Stanley knife/scissors.
4. Iron.
5. Staple gun and staples.
7. Fabric.
8. Foam about 10cm bigger than your MDF on all sides and the thickness you would like. I bought mine from Para Rubber.
Making the bedhead
1. Determine the size of the headboard and cut your MDF and foam pieces to match. Bunnings can cut the boards for you if need be.
2. Lay the MDF down & join the pieces together with the metal brackets. I used 3 brackets per join (top, bottom & middle.) 
3. Lay the wadding on a flat, firm surface, then lay the board on top. Ensure the wadding is pulled tightly and evenly across the face of the board then use the staple gun to staple the overlaps to the back of the board.
4. Lay your chosen IRONED fabric on a flat surface and place the wadding-covered board on top. Ensure the fabric is pulled tightly and evenly across the board then staple to secure. It's a good idea to start in the center and work out to the edges.
You can secure the bedhead to the wall but we're renting so I just simply stand this up between our ensemble & wall.

And there we have it!  And the best thing is that I can simply change the material whenever I get bored of this colour scheme!   For more inspiration, check these bedheads out from The Fabric Frame.

Friday, 3 June 2011

online stores

I can spend the day away just by looking through so many gorgeous online stores. It's no doubt obvious that I tend to LOVE handmade stores more than others just because I love to support people like me who are usually stay-at-home mums. Each designer has their own reason for making/selling their creations - for me it was a case of needing a creative outlet, as well as trying to earn a little extra money to put towards non-essentials (read here 'to support my cafe cravings'!).

My good friend Amy & I started a website in 2009 called Little Kiwis Nest which acts as a host for some very talented homebased/handmade designers. The majority of these sellers are Kiwis & are stay at home mums - & everyone of them makes incredible products for kids. Even though I have just moved back to Australia I've decided to reopen my little shop on Little Kiwis Nest so you can now get some of my goodies HERE.

I'm also trying to get my act together & open a store on Etsy which is an international website for handmade sellers. Wow, this site will have you hooked as well!  Bear with me while I find the time to fill my store there but here's the link for the future ... HERE.

There are loads of other great websites where you can source handmade goodies - eg http://www.madeit.com/, http://www.ozhandmade.com/  - so there really is no excuse not to find what you're looking for in one of these destinations!

Sunday, 22 May 2011

blogging!

Yay! I've entered the blogosphere to entice you all with my ramblings!  So I guess you're wondering who I am?  Where to start ...

Firstly I'm mum to two gorgeous girls who keep me on my toes.  They've given me the best excuse to pull the sewing machine out & sew up a storm!  Next, I'm a wife to a totally wonderful man who supports me in all my crazy endeavours & doesn't shake his head if the house-work doesn't get done for weeks on end whilst I'm caught up sewing! Of course, I'm a daughter as well, sibling to two & now aunty to two gorgeous little girls (more excuses to sew).

We're living on the beautiful Central Coast of New South Wales, Australia. That's a defintie 'Little Tee Tee LOVES'!  This place has seriously beautiful beaches (& seriously great cafes to top it off).

You'll get to know me quite a bit more in following posts, I'm sure.

So this blog will showcase some of my creations as I feel inspired to sew.  I love luxurious fabrics & laces. I love soft colours, especially lattes & chocolates (hmmm, in real-life too!). I love making sweet, little girls dresses which have both mums & kids smiling at the sight of them!

But it won't be all about me!  I LOVE reading other peoples blogs & browsing through all the handmade sites.  I can't wait to share all my finds in my 'Little Tee Tee loves' blog!

ps - say hi from time to time so i feel loved too!