We have a new home for our tutorials with easy access to our extensive range of Do-it-Yourself supplies! Please visit us at www.littleteetee.com.au
Friday 5 September 2014
Monday 27 May 2013
DIY Tutorial - How to make flower bunting. Perfect for little tea parties!
The perfect setting for a little tea party - a nook in the garden with floral bunting draped from a tree. Divine!
This bunting is REALLY easy to make - perfect for beginners or anyone needing a super quick project to add magic to an event.
What we used:
4.5 metres of our cotton embroidered lace HERE
fabric flowers (peonies on mesh) x 11 lots Purchase 4 lots of peony pink, 3 lots of light pink & 4 lots of pink.
Pins
Sewing Machine or needle and thread.
HOW TO:
- I cut our flower strands into groups as follows: 'peony pink' - 6 strands of 5 flowers, 'pink' - 6 strands of 6 flowers, and 'light pink - 4 strands of 4 flowers
- Pin the strands onto the lace. I pinned the peony pink flowers first, pinning approx every 1/2mtr. I left around 85cm at each end blank (ie don't pin the flowers there) to make sure there was plenty of lace to tie around the tree branch.
- After pinning the peony pink flowers in place, I then moved onto the 'pink'. I pinned these roughly 17cm up from the other flowers. You can get more mathematical than me & making them exactly even but I didn't see the need!
- Lastly, pin the light pink flower strands inbetween the 'pink' and the next 'peony pink'.
- Sew one continuous line along the cotton lace, making sure you catch all the flower strands. Hold the petals out of the way as you go ... and be sure not to run over your pins!
- And that's it!!!
Wednesday 16 January 2013
Australia Day - morning tea inspiration!
Can I just say ... I LOVE Australia Day! After returning from a 5 year overseas stint back in 2011, I was absolutely gobsmacked to see the patriotism in our country. I think it took me all of 5minutes to fall in love all things red/blue/white and to embrace the vigour of Australia Day celebrations.
With only one weekend until our country goes flag-mad, I thought I would share a VERY quick, yet very cute, Australia Day table setting. Oh, and did I mention that it's also cheap?!?
1. M&Ms in red/blue. Flag from the $2 shop |
2. Blue cordial with Little Tee Tee glass decorations |
All the props came out of my kitchen - cupcake stands, milk bottles, upturned red/white cups & saucers. I placed a wooden crate which hubby recently made at the back of the table to add height & use to highlight the gorgeous wild gum flowers.
3. Jaffas, Jam tarts, lamingtons from Coles |
4. Native flowers with flag toothpicks |
The local $2 shop provided the flag accessories - bunting, toothpicks & whirly wheels - all for $7.50. The doily table runner was made from Little Tee Tee doilies in 3 sizes & available HERE.
5. Upside down cups/saucers with fruit |
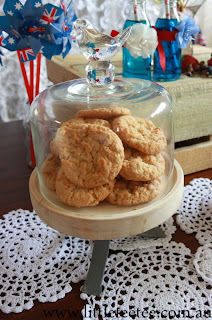
6. Anzac cookies (store bought!) |
7. Lamington bites with flag toothpicks from the $2 store |
8. Sweet fruit cluster with twigs from the garden |
If you still think hosting a morning tea it's a bit overwhelming let me convince you otherwise! It took only an hour at the shops to buy supplies (including getting side tracked in the Post Office & a gorgeous bedding shop!) and the only things I can remotely claim as home-made are below (& these are simple - my 5yr old helped)
For a cupcake tiered platter topper I pinned a small beaded flower onto a fabric rose heart. Both are purchasable from my shop for $1 each! Simply sticky tape it to the cupcake stand.
Decorate your milk bottles with Little Tee Tee fabric flowers attached with hot glue to red ribbons. Really quick, yet effective. These flower come in such a huge variety of flowers that you can colour match almost any party theme. Available HERE for only $1 per flower.
And lastly, these fruit/marshmallow skewers are perfect if you have kids itching to help make something for your party! Simply spike whatever fruit takes your fancy (watermelon would be great for Australia Day) & intersperse with marshmallows, then drizzle with blue icing (ie icing sugar + a little water + food colouring mixed together until smooth).
And there we have my suggestion for a stylish Australia Day morning tea. Aussie, Aussie, Aussie!!!
Friday 5 October 2012
Springtime and flowers
Spring time.
Everything is new and fresh. Sunshine, flowers, young animals, spring
cleaning. What is there not to love about spring time? Flowers are my favourite.
Well if the kids are outside playing (under the watchful eye
of your partner) in the garden looking at all the flowers, maybe you can sneak
toward that sewing machine and sew together something to represent all that is
great about spring. Flowers! There is an amazing selection found here at Little
Tee Tee –Laces, trims and more.
If the kids are running havoc around yourself then maybe you
could buy these lovely collections already beautifully hand made for you.
Hope this has inspired you to enjoy the flowers whether they
be hand made or in the garden.
Handmade With Love 4 kids - dress |
|
Pink Coco - Ladies hat |
Poppy and Rose - Tutu skirt |
Thursday 16 August 2012
Hearts Off to Handmade Designers!
I love Little Tee Tee Showcase
It started with a heart.
Its results are astounding. The brief was – create something special
from a heart.
It is amazing how inventive some people are. They are just
blessed with the creativity gene. I have
been so inspired by the beauty of some of these creations. Here are my personal favourites.
A large silver lace children's crown by Arabella's Wardrobe |
Hand stamped lace heart buttoned hairclips//elastics by Minky Minx Design Studo - Vintage Ispired Creations Heart Delight by KIDS ROOMS |
These amazing designers have put their wares on this showcase for your purchase (I would buy everything if I could!). It commences tomorrow at 8.30pm (Friday the 17th August 2012) and ends the same time on Monday the 20th August 2012.
If this has left you feeling inspired or got your creative mind buzzing you can find all your heart desires and needs HERE.
DIY Tutorial - 4 hair clips in 4 mins!
Yes, you CAN make gorgeous hair clips with not much fuss & no sewing skills whatsoever!
What you need:
Clip 1:
Clip 2:
Clip 3:
Clip 4:
And there you have 4 pretty new hair clips to match so many different outfits ... and all for under $8.00!
Happy Creating
x
What you need:
- Hot glue gun (you can pick these up at the local hardware store or even $2 shops)
- Fabric flowers - I used a vintage pink peony available HERE; a hot pink, felt-backed tulle flower with bling center available HERE; a light pink chiffon/tulle flower with diamontie centre available HERE & a gold ribbon flower available HERE.
- 1 x pink pearl & clear diamond mini button available HERE
- 3 x brooch tray/alligator clips available HERE
- 1 x grosgrain-covered alligator clip available HERE
Clip 1:
- Plug your glue gun in to warm up
- Take one metal brooch/alligator clip & the pink chiffon flower
- Squeeze lots of glue into the brooch tray & quickly place the felt part of the flower onto the glue
- Hold for 3 seconds then you're done!
- Cost: $1.85 (plus glue)
Clip 2:
- Take one metal brooch/alligator clip & the hot pink tulle flower
- Squeeze lots of glue into the brooch tray & quickly place the felt part of the flower onto the glue
- Hold for 3 seconds then you're done!
- Cost: $1.80 (plus glue)
Clip 3:
- Take one metal brooch/alligator clip, the mini pearl button & vintage pink chiffon flower.
- Cut off the excess mesh from the back of the flower
- Squeeze lots of glue into the brooch tray & quickly place the flower onto the glue & hold for 3 seconds.
- Place a dab of glue in the centre of the flower & hold the flat-backed button in place for 3 seconds - then you're done!
- Cost: $2.95 (plus glue)
- Take one ribbon-covered clip & the small gold flower.
- Squeeze a fair amount of glue onto the back of the flower then press it in place onto the clip.
- Hold for 3 seconds - then you're done!
- Cost: $1.10 (plus glue)
And there you have 4 pretty new hair clips to match so many different outfits ... and all for under $8.00!
Happy Creating
x
Subscribe to:
Posts (Atom)