Sunday, 29 January 2012

New Country Rose ruffle dress

As the school holidays come to an end, I have released my first dress for the new year.  And from the initial interest it's one that you may like!

Once I work through all the current orders, I will make a number of fabric variations in the same style.  Keep an eye out instore or come visit me at the next Handmade Craft Market on Feb 19 to see the new releases.

x

Monday, 9 January 2012

DIY -How to make Shabby-chic lace headbands

I'm having a bit of fun playing with my new laces & trims which are to be sold in the Little Tee Tee store.  I'm hoping my creations will help with a little inspiration on how to put stretch laces & fabric flowers to good use!


Team this white beaded stretch lace (available here) & these pretty flowers (available here) to make the above gorgeous headband.  I simply overlapped 3 of the white flowers & sewed them directly onto the lace headband. Easy!


I love this headband!  So simple, so shabby chic. Use a wide stretch elastic (this one available here), & sew in two pleats to make one section skinnier.  Add a singular rose (variety available here) as the focal point by carefully sewing around the base of the rose & then trimming off excess mesh.


Handy Headband Tutorial tips:

  • Measure the head of the person wearing the headband, where the headband is going to sit.

  • Cut the lace to the above measurement.

  • Sew at raw edge with right sides together. I use a zig-zag stitch & go back and forth at least 3 times. 


  • Want to see new laces & trims as soon as they arrive? Join my Little Tee Tee Laces & Trims facebook page now!


    Happy Creating!

    Saturday, 7 January 2012

    Toadstool table & stool set

    I have wanted to take my toadstool set out to play for a while ago & finally got a chance this week.  It seems the gods were looking down on me because my girls were in the mood to put up with mummy taking photos!


    The setting was utterly whimsical - a green pond with lilypads, a weeping willow-type tree, freshly mown grass and even a few cute bunnies hopping around the place (but not photographed).


    These gorgeous toadstool sets available for sale in my STORE now.  You don't need to be a photographer to appreciate the toadstools -although they do make an awesome photo prop! Children young & old will love a fairy-inspired addition to their garden or playroom.  My girls love using there's as their drawing table and for little tea parties with their friends.


    Whatever the setting, whatever the age, our toadstools are bound to bring out many a smile.

    xxx


    http://www.littleteetee.com/

    Monday, 2 January 2012

    Happy New Year & New laces released!

    With the official 'silly season' behind us I just want to wish everyone a very happy & fulfilled New Year. The New Year is a time to start afresh - leave the mistakes of 2011 behind but build on the lessons learnt. Grab hold of your dreams/aspirations & make them a reality! (Thanks to my friend Janelle for providing me with this challenge)

    I have a dream for my little creative outlet (aka Little Tee Tee) & I will be striving to make that a reality this year.  By sharing it, you can hold me accountable & keep me in check.  Feel free to give me advice along the way as it is a little new to me & I appreciate the insight of others.  So ... my goal is to grow the craft supplies side of my business.  Laces & trims (fabric roses etc) will be my speciality to start with but I may add to it as I discover little gems along the way.


    I'll still be creating dresses for little girls, selling at markets & taking custom orders for special occasions. I love sewing too much to walk away from that side of Little Tee Tee!

    2012 is my year to 'make or break' - to turn a hobby into a business.  Why the deadline, you ask? Well, my youngest is off to school in 2013 so it's now or never!  Here's the beginnings of my little lace empire - Little Tee Tee Laces & Trims. I'll be adding many more throughout the year.


    So here's to a succesful year to each & every one of you.  I sincerely hope that you reach whatever goal your heart desires in 2012.


    Now, here's where you give me a little nudge in the right direction by leaving a comment below!  Oh, where to start?!?

    Saturday, 10 December 2011

    Christmas cooking with kids - Cupcake / cookie decorations


    This is another fun 'craft' to do with your kids (or without, if you so choose!).  And the great thing is that it doesn't require cooking & is relatively mess-free.

    ingredients
    Box of white icing (aka fondant). (like this one  HERE -but doesn't matter what brand!)
    Food colouring. I use Wilton gel colours.
    Decorations - I used coloured cashous & also picked out stars from a sprinkle mixture)
    Icing sugar.
    Baking/wax paper
    Rolling pin (silicon is best)
    Cookie cutters

    how to:
    • Cut about a 1/4 of the icing off the block to use. Wrap the remainder & store in a container in the cupboard.

    • Knead the icing so it softens like play dough then add your colour a little bit at a time until you achieve the desired colour.


    • Sprinkle a little icing sugar on your sheet of baking paper & also rub some onto your rolling pin.

    • Roll the icing until it's no more than 1/4" thick. Be sure to recoat your rolling pin with icing sugar if the mixture starts to stick.

    • Cut your shape using the cookie cutter & decorate as desired. We pressed the cashous directly into the softened fondant but you could also 'glue' them on using a little bit of water/sugar paste.

    • Leave to dry for as long as it takes, depending on the temperature of the room. Ours took 24hrs.


    At this point you can either store them for months in advance in an airtight container in the cupboard or use them to decorate some yummy treats!  We used store-bought tic-toc biscuits & glued the Christmas tree on top by using a dab of icing sugar/water mixture.

    The most important ingredient = fun.

    xx


    ps - if you'd like more tips on working with white icing/fondant this is a great page.

    Wednesday, 7 December 2011

    Christmas cooking with kids - Oreo truffle balls


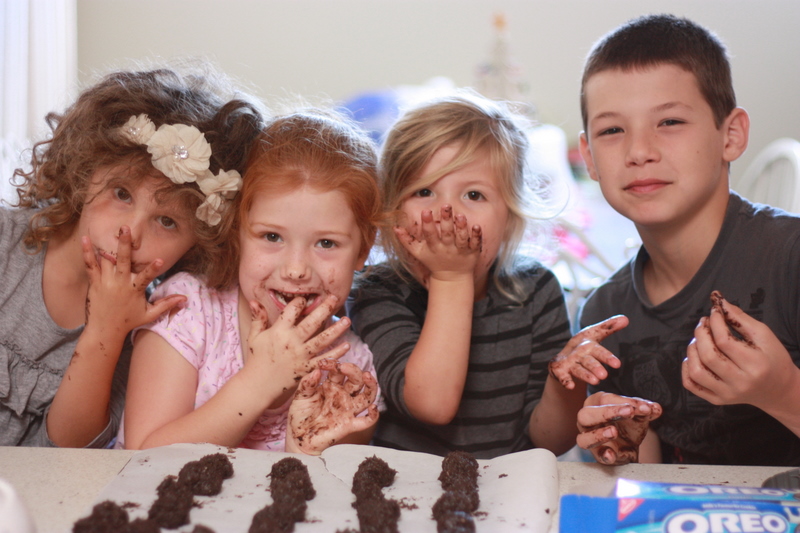
    Christmas is not Christmas until the benches have been covered in some variation of sugar, little fingers have been covered in yummy goo, and faces have been smeared with chocolate.  Such is the fun of 'cooking' with kids!

     I say 'cooking' because our first Christmas treat this year was a no-cook Orea truffle ball creation.  Yum, yum, yum!
    Ingredients -
    1 pkg. (8 oz.) Cream Cheese, softened
    2 pkg.  OREO Cookies, finely crushed (not powdered!) 
    Enough Semi-Sweet Chocolate, melted, to cover the balls.


    MIX cream cheese and cookie crumbs until well blended.
    SHAPE into 1-inch balls & refridgerate for an hour.
    DIP in melted chocolate; place on waxed paper-covered baking sheet.
    For extra effect you could sprinkle with extra cookie crumbs, drizzle another coloured chocolate on top, roll in 100's & 1000's.
    Store in tightly covered container in refrigerator.

    I took a few tips from the Kraft website.  Perhaps I should have read these before making our own batch! ...

    Kraft Kitchens Tips

    How to Melt Chocolate
    Place unwrapped chocolate squares in microwaveable bowl. Microwave on HIGH 2-1/2 min. or until chocolate is completely melted, stirring every 30 sec.
    How to Easily Dip Truffles
    To easily coat truffles with the melted chocolate, add truffles, in batches, to bowl of melted chocolate. Use 2 forks to roll truffles in chocolate until evenly coated. Remove truffles with forks, letting excess chocolate drip back into bowl. Place truffles on prepared baking sheet; let stand until firm.


    Tuesday, 6 December 2011

    flower girl & communion dresses

    i love creating dresses for special occasions.  Weddings, birthdays, communions, even family portraits are incredibly special events deserving of extra special outfits.  Actually, Little Tee Tee evolved when I was searching for something for my daughters to wear for a family portrait session.  I had a clear picture of what I wanted - something understated, in soft tones, with a hint of vintage charm.  After not finding anything 'just right' I created these two little dresses ... & my business was created soon after!


    Ever since, I have loved dressing little girls for their special occasions.  Some are custom designed dresses, other are bought from creations I have made & listed in store (http://littleteetee.com/).

    Here are a few of my gorgeous clients at their special events:


    I have two flower girl dresses on the cutting table right now.  They're a custom order for a wedding in January - lots of tulle (over 3mtrs each!) & pearl & diamonte details which will be a first for me.  Oh I love the challenge!

    I'm closing my custom orders now due to the Christmas break but I have a few dresses in store if you are after a last minute outfit!  But be quick ... Little Tee Tee will be closed for 3 weeks from the 9th to the 30th December.